"I do not claim that I can tell a story as it ought to be told. I only claim to know how a story ought to be told." -Mark Twain


Showing posts with label FEAST your eyes and stomach... Show all posts

11.08.2012

Calling all Pumpkin Eaters!

Do you want to know something funny?
I don't like pumpkin. Neither does my mom.
As in pumpkin anything.
But we both love to cook pumpkin everything!

 Our families love pumpkin (everything), so we are more than happy to oblige their taste buds.
Especially in the fall when the weather is cooler and the smell of (anything) pumpkin is just heavenly as it cooks. 
 One of my favorite things to make each year is mini-pumpkin cheesecakes...with gingersnap crust. I have posted this recipe before, but it is one worth repeating. (According to the taste-test-experts that eat my cooking.) 

 It starts with a crust made of crushed gingersnaps and graham crackers. I always throw in a pinch of cinnamon as well. (The entire recipe is below.) 

 I use the end of a potato peeler to pack in the crust. I use one of those mini-cheesecake pans where the bottoms pop out. I ordered mine online. In fact I have two of them and they are so easy to use and worth the  (small) investment.  Funny story: TWICE my husband has thrown away the silver cylinders that go in the bottom of the pans. He always forgets what they are and thinks they are some kind of washer or disc. TWICE I have rescued them from their trashy fate. (And the Hubs is the one that LOVES cheesecakes!)

 I use an ice-cream scoop to put the same amount of filling in each spot. I know I did not take a picture of that, but believe me, that is what I do!  

 This is right after they came out of the oven. They do fall back a little after they cool, but that is expected. Don't let it scare you. 

 I made the pumpkin treats one day during a football Saturday and I put the mini-cheesecakes on this cute platter. I just thought I would show it off before it was filled with pumpkin cheesecakes. 

 How cute are these little bite-size cheesecakes?  

 With the cheesecake pan, they are so easy to do. It would be fun to make an assortment of mini-cheesecakes for a party....Or Thanksgiving! 

 I like to pipe my cool whip on the top, just to add to the cuteness factor.

Mini Pumpkin Cheesecakes
Ingredients
1 package (8 oz)  Cream Cheese, room temperature
½ c. pumpkin puree
¼ c. + 2 tbsp. sugar
1 egg
2 tsp. heavy cream
¼ tsp. vanilla
¼ tsp. cinnamon
¼ tsp. pumpkin pie spice 
¹⁄₈ tsp. nutmeg

For the crust:
8 gingersnap cookies
1 graham cracker
1½  tbsp. melted butter
1½ tsp. brown sugar
¼ c. pecans
pinch of cinnamon

DIRECTIONS:
1. Preheat oven to 350 degrees. Lightly grease a mini cheesecake pan with baking spray. Set aside.
2. In the bowl of a food processor, grind all ingredients for crust, except for the melted butter. The mixture should resemble slightly coarse crumbs. Remove mixture and pour melted butter over. Mix until crumbs are wet. Press into the bottom of each hole. Place in oven and bake for 10 minutes.
3. While crust is baking prepare filling beating together cream cheese, sugar and pumpkin puree until smooth. Add spices, vanilla, heavy cream and egg. Mix until just combined.
4. Pour filling over each crust, dividing evenly. Place in oven and bake for 20 minutes. Remove from oven and cool in pan for 20 minutes before removing cheesecakes (yes your cheesecakes will sink a little, this is normal).
5. Remove cheesecakes from pan using the bottom of a wooden spoon. Using a butter knife, remove metal bottoms and place cheesecakes in an airtight container. Refrigerate for 2 hours before serving.

Linking to:

10.30.2012

Apple Butterscotch Bars---And So It Begins

When I say, "And so it begins...," I mean my effort to supply you with (what I think are) tasty recipes to use during the upcoming holiday season. 
Then I think to myself, "Really, Self?  It's not like people can't just go to Pinterest and look up any kind of recipe they want in the entire world." 


But Self will not listen and so it begins that over the next several weeks I will share recipes with you. My promise is that every recipe I share will be tried and true and tasty! Like the Apple Butterscotch Bars for instance. Oh. My. Word.  These even got two (very large) thumbs-up from my two youngest sons. 

I started with this recipe because I had some apples I needed to use up. I can't even remember what kind of apples they were. I know they were not baking apples and they still worked very well. I am one of those kind of girls that makes-do with what she has on hand. I peeled the apples then chopped them up before mixing them in. 

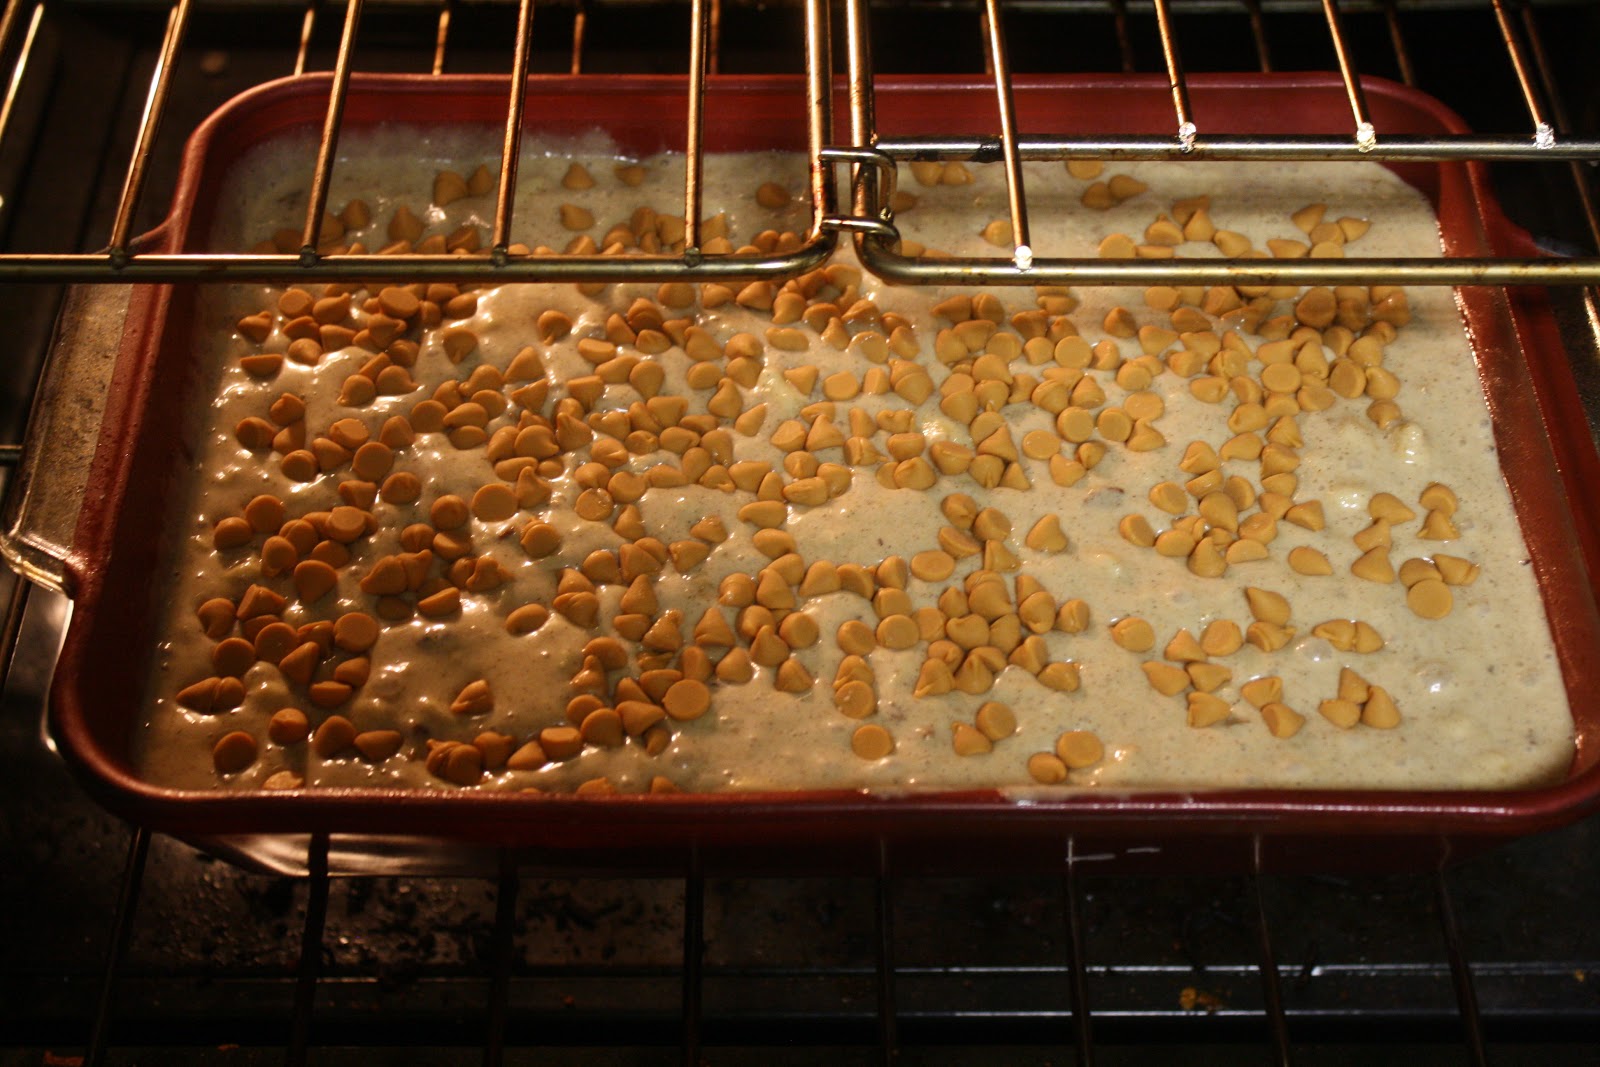
I put the mixture in a casserole dish/cake pan and sprinkled butterscotch chips over the top of the batter right before I put it in the oven. Deliciousness. 

The recipe did not call for this, but I added it and it was wonderful.....I added caramel to the top of the cake bars right when they came out of the oven. The caramel melted down into the cake bars. It was SO good. 

I have added it to the recipe I am including. It is a step you do not want to leave out! 


Apple Butterscotch Bars with Caramel Topping
2 c. sugar
1 c. oil
3 eggs, beaten
1 t. vanilla extract
2-1/2 c. all-purpose flour
2 t. baking powder
1 t. baking soda
1 t. salt
1 t. cinnamon
3 c. apples, cored, peeled and chopped
1 c. chopped nuts
1 c. butterscotch chips

Combine sugar, oil, eggs and vanilla in a large bowl. Mix in flour, baking powder, baking soda, salt and cinnamon; mix well. Stir in apples and nuts. Spread in a lightly greased 13"x9" baking pan; sprinkle with butterscotch chips. Bake at 350 degrees for 40 to 45 minutes. (Optional)...When the bars come out of the oven, spread melted caramel over the top. (You can use the kind that is used on ice cream). Also I used a mixture of walnuts and pecans (because that is what I had), but I liked the walnuts best. It gives it some crunch! Makes about 3 dozen.....if my sons are not at your house! 

Just so you know, my recipe did not make 3 dozen. My sons cut their first (generous) piece to taste-test. Then after that the next piece(s!!) were even more generous....as you can imagine. 

Enjoy this delicious recipe. 

Linking this to:
Foodie Friday

11.30.2010

Grammie's Cake

One of the desserts I made for Thanksgiving we simply call
"Grammie's Cake".
Quite simply, because it was my Grammie's cake.
She loved to make it!
Others that make it, that are not related to me, call it
"Grammie's Cake".
It is just that kind of a cake,
that has a life of its own.

I apologize that the pictures do not do it justice. It is delicious. VERY. It is also SO easy to make. Now, admittedly, my Grammie would have made her own Angel Food cake. I buy one already made. And while we are on that topic, have you noticed how much smaller the Angel Food cakes are than they used to be?  It use to be when I made this cake it looked more dramatic and beautiful because so much of the middle was gone and filled back in. Now there is hardly any middle at all to take out and fill back in!! 
My Grammie
often made this cake in a large loaf pan. 
I will give you the recipe, then the ideas:

GRAMMIE'S CAKE
1 Angel Food cake
12 oz. chocolate chips
4 eggs (separated)
1 pint of whipping cream
2 T. sugar
1 cup nuts (optional)

Melt the chocolate chips in heavy pan or double-boiler. Add well beaten egg yolks. Stir constantly so that your eggs do not scramble!  Let cool.
Then FOLD in beaten whites of the eggs.
Whip the whipping cream with the sugar until thicker and stiffer.
Fold in the whipping cream till all is well mixed.
If you are adding the nuts, mix them in at this stage.
HERE is where you can use the cake two different ways:
If you use the angel food cake, then cut the top off.
Pull out the insides, leaving the walls on both sides as well as the bottom.
Fill it back up with the chocolate mixture and put the top back on.
Put it in the icebox to cool. Put the rest of the mixture in the icebox to cool.
It will thicken quickly.
After it has thickened, use the rest of the mixture to 'ice' the cake.
You will still have chocolate mixture, I add this to the innards I took out of the cake
and put it in a bowl with the chocolate and hide it from everyone else.
Then my Hubby and I enjoy it later without having to share!
The (premade) angel food cakes are so small now, that I think
this recipe is almost enough 'goop' for two cakes!
OR
you can do as my Grammie often did
and
she tore the entire angel food cake into pieces.  She
folded in the chocolate mixture
and put the entire cake
into a big loaf pan.
Either way you choose to do the cake
let it cool
and when you cut it
you will get 'oohs and aahs'
but most of all...
RAVE reviews.
It will quickly become a
"Will you make Grammie's cake?" kind of favorite!
Enjoy

11.28.2010

Woof Woof----A Puppy Chow twist!

I know we are all still recovering from our Thanksgiving feasts, but it is Sunday afternoon..... and there is football on TV....and lots of great Christmas movies. So, I figured why not suggest a little treat?  This treat is so easy to make and will get you through the holiday season when you find yourself in a pinch. I know we have all made Puppy Chow many times, but I thought I would share what I do a little differently.
I melt an entire bag of chocolate chips AND an entire bag of butterscotch chips and then pour over my rice cereal. I do not use butter or peanut butter. Just a bag of chocolate and butterscotch chips. I then toss it on my rice cereal till it is all coated. Then I pour the entire 'mess' into a plastic grocery store bag.  I put powdered sugar into the grocery store bag as well, then shake. And shake. And make sure it is all coated. If it needs more powdered sugar I add more. :) Then I bag it up for treats....or put it in a big bowl and watch it disappear!!!  Just some friendly little suggestions and tips for a lazy Sunday afternoon. Enjoy!!

11.22.2010

Dressing up your Thanksgiving Table.....The best DRESSING of all time!

My second favorite recipe of the day is from my own grandmother.  It is her dressing recipe that we use on Thanksgiving...and Christmas.I have had lots of different dressings in my life....some that I liked and some...well...let's just say not so much. But every single time I come back to my Grammie's recipe. It is perfect. It is easy. It makes my mouth water (literally) just writing about it.
The recipe written out in my grandmother's own writing. If she were alive today, she would be 120.

CORNBREAD DRESSING  
4 qts. Day old bread. (I usually toast about three of four loaves of bread for the same effect)

1 large pan (cake pan size) of cornbread (I usually make three boxes of Jiffy cornbread)

1/3 cup milk

1 stick butter

1 large onion, chopped/minced

½ -1 cup celery, chopped

2 tsp. sage

salt to taste

pepper to taste

chicken or turkey broth (canned is fine)

Tear the bread into small pieces and place in a large mixing bowl. Crumble cornbread into the bowl. Add sage. Add salt and pepper. Pour milk over the bread and toss around trying to get it all somewhat wet (moist).


Saute’ onion and celery in butter until the veggies appear tender (about 5 minutes).

Combine onion and celery with breads in mixing bowl. Mix lightly.


Add enough chicken broth until the mixture is like a thick batter. I use my fingers here and just dig in and get it all smooshed up. It will be sticky but thick and moist.


Put it into a greased (big) cake pan. Cover with foil. Bake about 45 minutes at 350. Take the foil off the last 15 minutes.

This is not an exact science. You can ‘play’ with the recipe and it will still work. It is very delicious. It is even better warmed up the next day!


Upper Crust--(As in the best recipes!)

My plan is to post two recipes today. The two recipes are among my favorite recipes of all time. Hopefully they get to you before you make out your final Thanksgiving dinner list.
The first recipe is for Pineapple Chiffon Pie. I do not claim to be any kind of pie-maker by any stretch of the imagination. But simply put, we do not have Thanksgiving without two of these pies on the dessert table. (Why two?  Because one is not enough!)
My whole family loves this pie.
My extended family loves this pie.


 And as most great recipes and foods go
there are great memories
behind this pie.

 The recipe comes to me from my best friend's grandmother.
My best friend while growing up, lived across the street from me.
I have little doubt that there was
probably a rut
in the asphalt
that separated our houses.


What was equally as wonderful
was that my best friend's 
grandmother 
lived next door to my best friend...
therefore making it across 
the street
from me as well! 

Even better....
Her grandmother cooked a hot meal
every.single.day.
at noon.
And if I was hanging out with 
my best friend,
then I got to eat at Ruby's as well.
Believe me, 
I spent many, many a noon meal
in Ruby's kitchen.
And she was one of the World's Greatest Cooks!


(Don't be afraid to make mini-pies as well. I love mini food...Then you don't realize you are eating so much! ha!)

With this little bit of
background knowledge,
you have to know
that you will LOVE this pie...
and make it a family favorite as well.

Pineapple Chiffon Pie
(or I simply say Pineapple Pie)
1 pie crust--already baked
1 1/2 C. milk
2 T. (heaping) flour
3/4 C. drained crushed pineapple
3/4 C. sugar
2 eggs separated
Put milk on to heat. Mix sugar and flour together. Add this to the hot milk, stirring constantly and well.
Stir in beaten egg yolks.
Stir constantly, so the yolks stay smooth.
Bring to a soft boil and continue until the mixture thickens.
This will take about 7 minutes. 
Believe me, the end result is worth it. Keep stirring...or whisking (which is what I use).
Remove from heat and add drained pineapple.
Stir. While this mixture is cooling,
beat the egg whites until thick and frothy.
FOLD in the egg whites. (The FOLDing is important so the pie stays light and fluffy).
Pour into baked pie crust.
Refrigerate until cool.
Before serving top with Whipped Cream.
Hide the second pie you make from everyone else!
Enjoy!!!
Believe me...you will!


11.20.2010

A LOTTA Chocolate Bars.......

I have not done a lot of chocolate recipes in this 
recipe jaunt I have been on. But today and yesterday will
certainly make up for that.
Both are very chocolate! BUT both are super fast and easy...
does that make up for it? 

Chocolate Chocolate A Lotta Chocolate!

Ingredients:

  • 1 3/4 cups flour
  • 3/4 cup powdered sugar
  • 1/4 cup unsweetened cocoa powder 
  • 1 cup butter
  • 2 (12 ounce) bags semi-sweet chocolate chips
  • 1 (14 ounce) can sweetened condensed milk
  • 3/4 cup nuts, chopped 
  • 1 teaspoon vanilla
  • 1 (12 ounce) bag milk chocolate chips
  CRUST: Combine Flour,Sugar,Cocoa,and Butter. 
Mixture will be crumbly.
Press firmly into a 13x9 pan. Bake at 350 for 15 minutes.
  1. In saucepan combine both pkgs of semi-sweet Choc Chips,Vanilla, Milk,and nuts.
  2.  Stir until well melted. Pour over prepared crust. 
  3. Sprinkle Milk Chocolate chips on top and press on to top of filling. Bake for 20 minutes. Cool at least 10 minutes
  4. ENJOY!!

11.19.2010

Choc -- o -----late (said with a French accent!)

This recipe is for anyone that is capable of reading. Really. Literally, anyone can make this. I got the recipe from my mother-in-law. My husband likes to give her a hard time about her 'easy' pie recipes. Nevertheless, this is a great recipe that you will love. It is probably the fastest and easiest recipe I have. Not to mention it tastes great.


Ingredients:
Crust--
You can use a pre-made graham cracker crust OR
1 1/4 cup crushed graham crackers
5 Tbs. melted butter

Filling--
7 -- 1.5 Hershey Bars with almond
1- 8 oz. container Cool Whip

DIRECTIONS:
Mix the melted butter and cracker crumbs in a small bowl.
Press into pie pan. Use the back of a spoon to shape it into bowl.

Break all the Hershey bars into small pieces. Place in microwave bowl.
Melt the chocolate in 30 second intervals. Stir. Melt again.
Melt for 30 seconds and stir until all is melted.
When all your chocolate is melted, fold in the Cool Whip.
When the TWO ingredients of the pie are mixed well, 
pour it into the crust.
If you want to make chocolate curls, then have one extra 
candy bar handy (without nuts).
Using a potato peeler, scrape straight down the long side of the
candy bar until you have all the curls you want.
Put the pie into the fridge for several hours.
If you want to top with additional
Cool Whip
and/or
hot fudge topping (!!!!)
feel free!
****One more note---WHEN you make this for Thanksgiving...or anytime..
don't tell all the people that give you compliments
that there are ONLY TWO INGREDIENTS!!!
ENJOY! 


Hello Jello(s)!!

I did not really mean to take the day off yesterday, but I could not, for the life of me, get Blogger to cooperate. So to make it up, I will post yesterdays recipes as well as todays. It will be the day of many posts!
With that in mind, I am putting up two strawberry jellos. They are easy to make and delicious to eat. You will not go wrong with either. In fact, I make both of them for Thanksgivng. (Yep, I'm nothing if not creative!)

                                        Strawberry Applesauce Jello
                                                                    INGREDIENTS:
1 large box strawberry or strawberry/banana jello
1 jar applesauce (regular size jar)
1 can crushed pineapple (regular size)
7-Up

Dissolve 1 large box of Strawberry (or Strawberry/Banana) Jello
with a jar of applesauce (in a saucepan) over low heat.
When the jello is thinned out (you will be able to see this as it disolves)
take from heat.
Add one can of crushed (drained) pineapple.
Stir well.
To this add about 2 cups of 7-Up.
(If I don't have 7-Up or Sprite, I add Mt. Dew or Diet Mt. Dew)
Stir well.
Put in whatever container you choose.
Put in fridge till firm.


Strawberry Sour Cream Jello
INGREDIENTS
1 large box strawberry or strawberry/banana jello
2 C. boiling water
1 lb. strawberries
1 small can pineapple (drained)
Sour cream
Mix all and let set. Before serving add sour cream to the top.
I like to put mine in a compote bowl and add layers. Therefore, you have to let the first layer set up some, add the sour cream then put another layer on, let it set up, add the sour cream, then put the final layer on.
If you make this the day before, then it is no problem.

With both of these jellos I frequently make double the amount shown.

Good to the last drop bite!

11.17.2010

Pecan Pie Bars .......to make and take!

If you are a pecan pie lover, then you will be a pecan pie bar lover. Quick and easy. (Do you notice a pattern in the recipes I have put on here?)
I have one more pecan pie(plus a little something else!) recipe that I am going to try out this weekend....and hopefully share with you. In the meantime, you can make the Pecan Pie Bars and freeze them until you need them. As always....................Enjoy!!
Pecan Pie Bars
Ingredients:
2 cups all-purpose flour
1/2 cup sugar
1/8 teaspoon salt
3/4 cup butter, cut up
1 cup firmly packed brown sugar
1 cup light corn syrup
1/2 cup butter
4 large eggs, lightly beaten
2 1/2 cups finely chopped pecans
1 teaspoon vanilla extract

 
Directions
Combine flour, sugar, and salt in large bowl; cut in 3/4 cup butter thoroughly with a pastry blender until mixture resembles very fine crumbs. Press mixture evenly into a greased 13" x 9" pan, using a piece of plastic wrap to press crumb mixture firmly in pan. Bake at 350° for 17 to 20 minutes, or until lightly browned.

 
Combine brown sugar, corn syrup, and 1/2 cup butter in a saucepan; bring to a boil over medium heat, stirring gently. Remove from heat. Stir one-fourth of hot mixture into beaten eggs; add to remaining hot mixture. Stir in pecans and vanilla. Pour filling over crust. Bake at 350° for 34 to 35 minutes or until set. Cool completely in pan on a wire rack, about 2-3 hours. Cut into bars.


LinkWithin

Related Posts with Thumbnails