"I do not claim that I can tell a story as it ought to be told. I only claim to know how a story ought to be told." -Mark Twain


4.08.2013

Tulip Wreaths and Glue Guns!

Isn't she lovely?

 I just love it. It is big. It is red. It is springtime. It is perfect. 
And it only cost me $15. 
And 741,000 glue gun burns. 
 Let's back up and I will tell you how I made it. It was really quite easy. Especially if there is a good show on TV that you can watch while you are making it. OR perhaps watching TV is perhaps why I have the 741,000 glue gun burns! So...make this at your own risk! ha!

 I saw this last year and wanted to make it, but never did. Then I saw it again the first of March and got the things to make it. I read the tutorial at DIY Village. She gives great instructions and never mentions 741,000 glue gun burns. So I gathered up my things. I already had the spool of ribbon from the dollar store. I had the wreath. (If you have to buy one, use your coupon from Hob Lob or Michaels.) The only thing I actually bought were 15 bunches of red tulips at the Dollar Tree. While you are at the Dollar Tree you might as well buy band-aids too. Just saying.
 If you will notice the tulips are slightly different. There are two reasons. I bought all the red ones they had and in order to do that, I had to buy them slightly different. The ones one the right are a little more open and "ruffly". I used those as my base. The wreath at DIY Village had three colors, but I just wanted one color. If you read this blog at all you know that red is my color of choice. 
 I also had this ribbon from Hob Lob that I ended up using. It was not in my original picture, but I ended up liking it MUCH better than the silk ribbon I used. (The ribbon is used to wrap the wreath. Then I made a bow later as well.)
 I also found that in order to get those $1 price tags off, it was much easier to slide the flower or the leaves off and slide the tag off than to try to tear it off. Then just put the flower back together. 

 I did not get pictures of this, but (obviously????) I cut the groups of tulips apart into singlets. I then did as the tutorial said and stuck my flowers down into the wreath in the seams of the ribbon. I put one on the outside edge, one on the inside edge and one in the middle. I also put a dab of hot glue on each and every stem I put into the wreath. THAT is where my 741,000 glue-gun burns came in. 
 As you can see in the picture before this, I ran out of that silky ribbon. I did not want to go to the store just for a spool of ribbon. That is when I pulled the burlap ribbon out. I liked it much better: 1. For looks and 2. Then you could put the stem down anywhere. You did not have to just use the "seams".  I still put glue on the end of each stem. 
 I had the wreath laying flat as I added my tulips. Then I decided I needed it sitting up so I could see it better. I propped it on a bucket. Next time I will make the wreath outside and nail it on a deck post or something. It would be super easy to make if it was hanging as you stuff it full of tulips. 

 Then in my ineptness brilliance I decided I wanted a burlap bow as well. I went to pull out the tulips for a space and it was darn hard to get those tulips out. Let me just say those 741,000 glue-gun burns were apparently worth it. Those tulips are in to stay! 
So I just pulled out a few and squished in the burlap bow. But I am glad I did. I love the roughness against the tulips. 

 In case you are wondering what all the green stems are, the $1 tulips also come with greenery. You can't beat that

While the tutorial I used made hers symmetrical and perfect, my wreath is more "wild". It is definitely round, but not perfectly round. That is the look I chose. You can make yours round if you prefer. You would just be more careful sticking in the tulips to keep it symmetrical. 


 OK. I  have mine on the wooden door as you saw in several shots. But I hung it on a glass storm door to show you what it looks like on the back. Remember where I ran out of the silk ribbon? Well now I have a two-ribbon wreath. If this was going to hang up where the back could be seen, then I would have made it all one ribbon. Mine won't matter. I'm telling you tho. Go with the burlap. I suppose you wouldn't even have to wrap it if you didn't want to. It would just be a green styrofoam showing though. 

 So this is where she hangs. Isn't she lovely? Even if you have to buy the wreath and the ribbon as well as the tulips, this wreath still wouldn't cost over $25 at the most. I saw the same wreath on Etsy for $95. Of course, depending on the size you want, it could be a smaller wreath as well. 
This wreath surely says "Welcome Spring"...and maybe even "Tiptoe Thru the Tulips"!
Just watch out for those glue-guns.
Linking with:

4.03.2013

March Madness Table Idea for April!


Crazy, isn't it?
How March Madness takes up 
part of April as well?

 For those of you that are die-hard basketball fans, I am posting my ode to the basketball gods with my March Madness table. 
 I used my regular (at the time) kitchen table, a little painters tape, a little electrical tape, a package of stick-on letters and one basketball-crazy son. (Sons are optional in this table idea, but everything else is needed.) 
 After my son made my (at the time) kitchen table into an amazing basketball court, I got to bring in the fun stuff for the actual party. I used Easter basket basketballs to hold some of the things like silverware and napkins. Some of the Easter basket basketballs were nylon and some were felt. All were cute.

 I also took a cheapo basketball and cut it half (right on the seam). I then had two serving dishes for chips. 

 I bought little basketballs out of the party favor aisle at Wal-Mart and had them laying all over the court (table). My cute plates were from the dollar section of Target years ago, but I know you can find cute things at Hob Lob or a party supply store too.
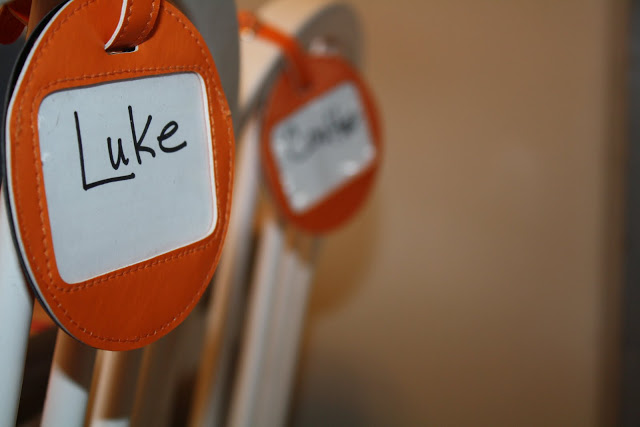
 I used basketball luggage tags tied to the chairs to "star" some of the basketball players from our party. Those name tags are for children's luggage, but can be used for so many other things! (Diaper bags, napkin rings, etc.)
 If you can't find the luggage tags, then you can just tie basketball numbers (address numbers in their other life) to the backs of chairs. You can use the number(s) of your favorite players. 
 The flat basketballs were erasers in the shape of basketballs. All these little balls could go home as party favors as well too. 
 I found some disposable basketball dishes at Hobby Lobby. (Notice the orange suckers in the corner I used too?)
 This was originally a cheap basketball frame from the Dollar store. I renamed all my food dishes with appropriate name and put the menu inside the frame. 
 I even included an old net in my March Madness tablescape. Of course you could buy a new net to use as well!
 Here are the types of tape I used for my "basketball court". And yes, it all came off very easily once March Madness was over. 
 My son Luke was serious about getting this court set up right! He even used a tape measure so it was completely even. I think less trouble could go in to the making of the court, but I will say, my "court" looked very, very good!
 Since I do not have this table anymore in my kitchen, I was trying to think how I could recreate the court and still enjoy some March Madness. Plus those of you that do not have a harvest type table could do the same......This could be recreated easily on a piece of MDF and laid across a kitchen table. Not only that, but a basketball court could be on one side and a football field could be on the other side! 
 Hmmm. I'm thinking I have TWO new jobs for Luke! 
 If you put it on a piece of MDF you could store it and bring it out when needed.....instead of ripping it off of the table at the end of March Madness. 
In fact you could also just put in your favorite team logo somewhere on your "court" or "field". 
In the meantime, keep your eyes peeled for all the inexpensive little treasures that can be repurposed to be part of your tablescape.
Anyone need to hire Luke?

Linking up with:

Yes, Jello. (But with a weak twist?????)

Obviously I am sorely lacking if I am posting jello ideas.
But I am.
(Lacking and posting!)

 In fact, even as I post this, I realize it has probably been done four kajillion times and I am the only one that never boarded that train. But pretend with me that I had a great idea. 
 I hosted Easter dinner for the family. I was making the tried-and-true-made-a-million-times strawberry jello with the pretzel crust. But I had a (probably very unoriginal) idea that I would make the jello in a cheesecake pan instead of a casserole-type dish. That way the pretty layers would show....Even before it was cut into. 
 I tried it and it worked like a charm. I made it in my large cheesecake pan and it took every bit of the pan. Just before serving, I ran a knife around the inside edge of the pan. I then popped the buckle of the pan open  and let the pan expand slowly. Bingo!!  Jello!  Pretty Jello!!
Just in case you are the only person in America to never make this jello, I will include the recipe. And just in case you also think this was an original ingenious idea, I thank you for that! And yes, it tasted just as good as it looked! 

STRAWBERRY PRETZEL SALAD


HEAT oven to 350°F.
MIX pretzel crumbs,  sugar and butter; press onto bottom of  pan. Bake 9 min. Cool.
BEAT cream cheese and sugar. Fold in cool whip; spread over cooled crust. Refrigerate.
ADD boiling water to gelatin mix in large bowl; stir until completely dissolved.  Pour over cream cheese layer. 
POUR berries onto gelatin. Refrigerate 3 hours or until firm.
****TIPS to make this the best.
DO NOT bake the crust over 9 minutes. In fact I usually pull it out at 7 or 8. Over nine makes it like cement. 
I add the cream cheese layer when the crust is cool.
After I mix the jello, I put it in the fridge for about 30 minutes then I add it over the cream cheese layer. That has given it time to cool as well as gel a little. I add the sliced strawberries  after I have added the jello layer. That is what makes the sliced strawberries look so nice.

I have seen these recipes that add two blocks of cream cheese. That is not needed at all. 
I used my cheesecake pan as I would to make a cheesecake. Super easy to make. 
Linking with:


3.27.2013

Some Bunnies Easter!

With the exception of the very cute big bunnies,
everything at this table was shopped from home, 
or a great deal. 

The cabbage planter was a garage sale find for $1. The cute little bunny dishes were out of the $1 bin at Target. Everything else I have had forever and I just mixed and (very little) matched until I had a Bunny Table set up!

Now....about those cute white bunnies in the center of the table! Well they were gifts to me from my sister and she bought them at the (wonderful) Nell Hill's. Aren't they cute?  
The perfect casual, but fun, Easter table done for very little money. 

Linking to:

3.25.2013

Lessons in Carrot-ing!

 At first glace did you think that was a basket of big 'ole (real) carrots? I think it kind of looks like it. 

 Well for those two or three of you I had fooled, they are not (real) giant carrots. They are giant carrots, but they began their Easter seasonal life as carrot bats. Yes, as in baseball. And they come with that green ball. The great news is that they only cost $1 a piece. Now that's a deal. They can be found at your local Wally World or Dollar Tree. I am sure they are at other places as well, but that is where I purchased mine. 

 They also begin their seasonal Easter life looking very orange and very plastic. Ugh. But about a minutes worth of work on each carrot takes care of that. I used gel stain I already had. I simply wiped each carrot down with the stain then wiped off what I did not want to stay on. 

 The carrot on the far left has not been wiped down with stain yet. You can tell the difference. The others look more like real carrots now. 

 During spring and Easter season I love to use them everywhere. I put them in all sorts of baskets and arrangements. I just stick the "handle" part of the "bat" down in the container so that only the top shows. No one is the wiser....unless you are reading this and now you know! 

 As I was sitting here typing this up, it occurred to me that perhaps a little of the green raffia or Easter grass would look cute glued to the top. Or even some torn/shredded green fabric. Hmm. I'll have to try that out!
 As you can see, I've put these carrots in all sorts of arrangements and containers. I've used them from rustic, to tin, to galvanized, to china. They seem to fit in quite well in all places. 


 I've even used them on the door a couple of times in baskets. 
 Actually the ones on the door I never even hit with stain. You can tell in the pictures, but I don't think you can tell when driving by and looking at the door. I should probably stain them though. 

 I even used them last year when I took pictures of (then) 12-day-old Leightyn. I made cute Easter cards that said, "There is Some-Bunny new in town!" (Don't worry, I cropped the picture so you couldn't see the adult!
This year Leightyn carries the carrots around hitting them together like drumsticks! 

 So that is your complete "lesson in carrot-ing". Now you need to head to your local store and find some "carrot bats" to buy. Hit them with a little stain or watered down paint and you too are ready to carrot-ize just in time for Easter. Have you seen an easier Easter tutorial????
Linking to:

LinkWithin

Related Posts with Thumbnails