"I do not claim that I can tell a story as it ought to be told. I only claim to know how a story ought to be told." -Mark Twain


11.19.2012

Talkin' Turkey

Today was the annual pilgrimage (pilgrims...get it? Thanksgiving--pilgrims..) home to make The Turkeys. 
The week before Thanksgiving, I try my best to gather my brood together for our turkey-treat-making-afternoon.
Technically, it is not a pilgrimage, 
but the word just sounded so darn good
with turkey-makin'. 
 The children and I have been making the turkey treats together for over 20 years now. I tried to remember the first year we started this and I think it was 23 years ago. Now that's a lot of turkeys! 
 I gathered the supplies (which does NOT include the bananas in the picture). And of course, wouldn't you know it, the creme drops (the turkey body) are not on the table for the picture. So, in your mind, take OUT the bananas and put IN packages of creme drops. Ha! 
 And while I was shopping the cookie aisle for the turkey "feather" cookies, I spotted the cookies pictured above. They are the exact "feather" cookie we use...only in miniature. Well, with all the new babies we have had in our family this year, I thought we surely needed some turkey babies as well. You will see them in some of the pics. They worked out perfectly. 
 There are only a few rules for the Turkey-Treat-Makin'-Day:  1. Have fun. Enjoy yourself. Laugh. Have more fun. 2. Make your turkey's look however you want them to look. Don't worry if they are crooked, their feet are backwards, or they have "black" eyes from too much icing, or are "blind" because you forgot to dot their eyes! And 3. Eat as much as you want while you are making them. Eat all the "mistakes" for sure! These rules have sustained us and worked well for 20+ years. 
 We gather at one of the big tables and everyone has their own "station" with supplies. I learned a long time ago, that it is best to put down plastic when doing this. That "chocolate glue" gets on everything and it takes forever to get off otherwise. I just use the thin plastic you get in the paint department. Works perfect. Believe me, even the adults get messy!
 Every year we invite others to join us. We have had cousins and cousins of cousins, friends and in-laws. It was amusing as I posted pictures of today's turkeys on Facebook and Instagram, different people from years past commented, "I remember making those with you!"  I loved it! I have learned also through the years to use plastic spoons. It is much easier to throw those away than to clean spoons loaded with chocolate "glue". Everyone also gets a supply of toothpicks (you can see in the corner of the dish) to keep dot their turkey's eyes. (IF they so choose!) 
 You can see in this picture that each person also had their own bowl of "chocolate glue" (as my kids call it.) Of course, it is actually almond bark. It holds the bodies and heads and feet together instantly. We just kept refreshing the bowls with new "glue" as needed. Having the individual bowls is SO much easier than reaching across the table to share a big bowl. Also, just melting a small amount of almond bark at a time with small children is much better as well. 
 Sometimes the turkeys get mixed all together and sometimes, like today, each person had something they wanted to do with their own brood. I think there will be a LOT of Turkey Treats at schools and work places on Monday!

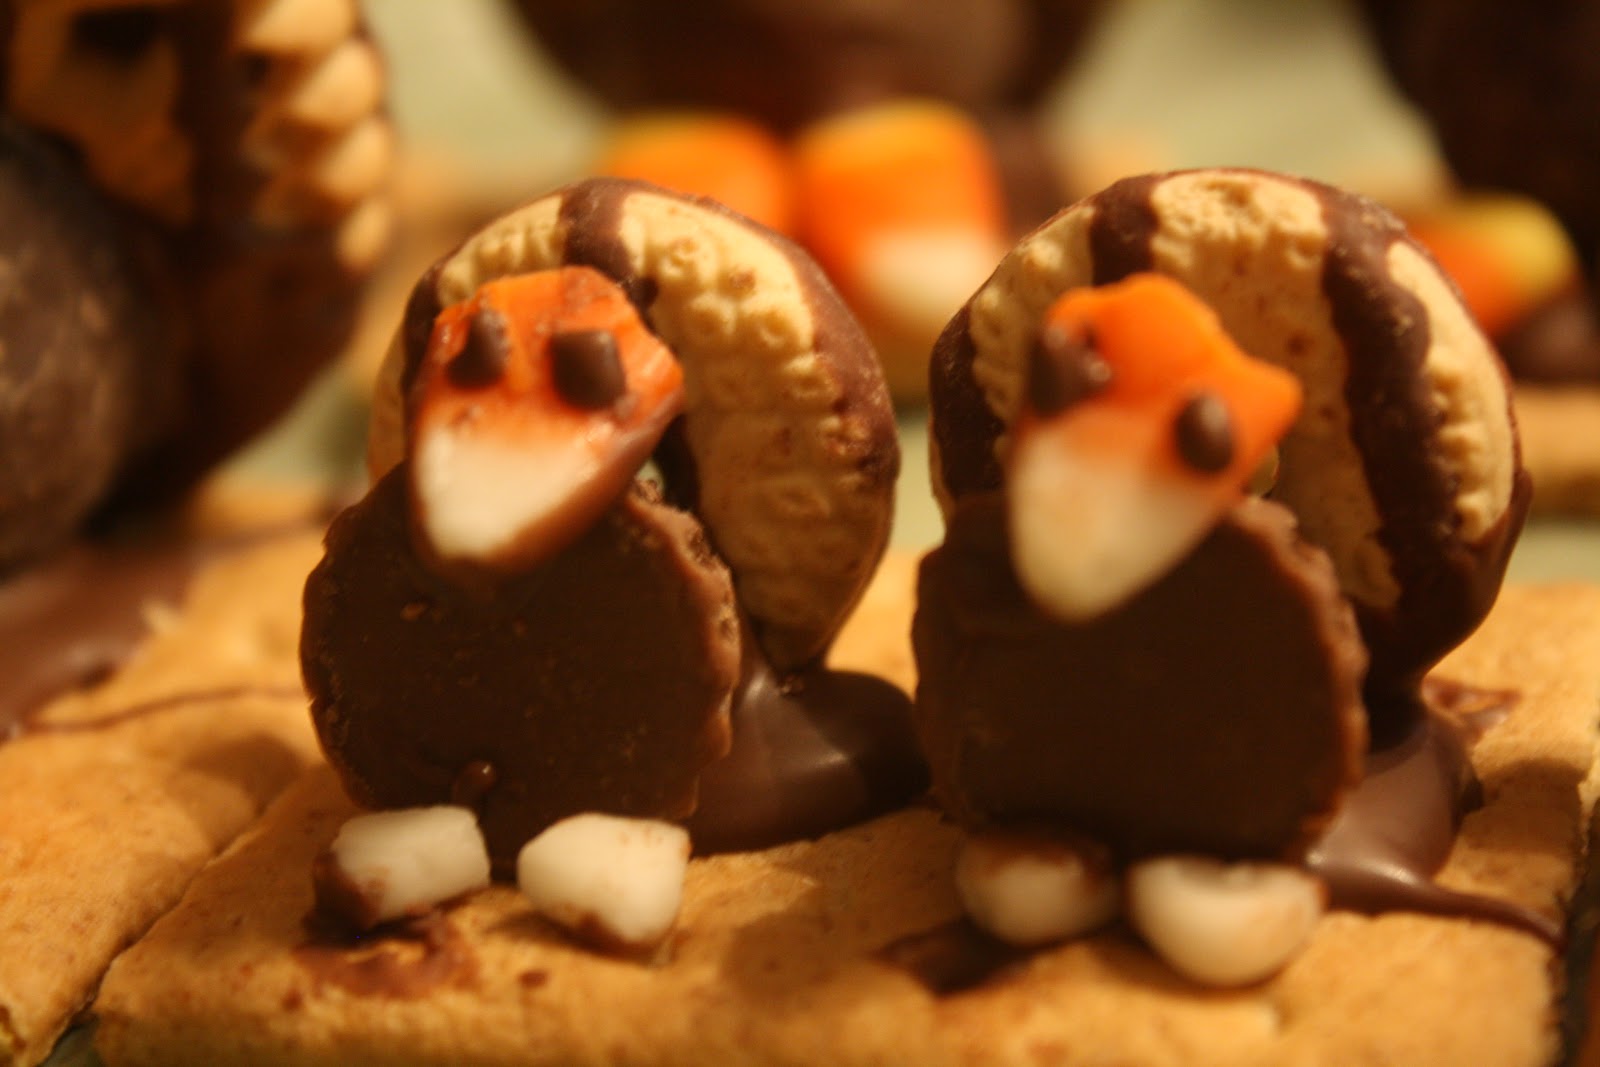
 Here is the first attempt at the baby turkeys. The creator put two together on a graham cracker. She used bits and pieces from the bottom of the candy corn bucket for the faces and feet. After seeing how well they turned out, we just used a knife to cut the pieces just like that for the rest of the "babies". Aren't they cute?  We used mini Reese cups for some of the baby bodies and Hershey drops for some of the baby bodies. Both worked out well. So fun!

 You can see this is serious business for some of them!  (By the way, we also keep wet wash cloths and dry towels handy for each person. We've got this down to a science, can you tell?!!)
 This was little Ebonie's first time to make the turkeys. Caroline (in the blue) is a seasoned-vet, having done this for years with us. She recounted stories about every year she has made them. Little Ebonie asked when she left, "Do you think I can come back to make Christmas turkeys?" Awwwww. 
 When we were through making them, we packaged them up to go home with each person. I also made plates of turkeys for my neighbors. I wrapped them in cellophane, put a big bow on top and let the girls deliver them to our neighborhood. 
 Caroline told me when she came back from delivering, that "every single person" loved them. Really. What's not to love? 


 By the way, to counter-act all the sweetness, we also have supper while we're creating. I just did not take pictures of that. We have homemade pizza and chili and fruit and fun drinks. That too is part of the tradition. 

 In years past we have also used the turkeys as "place cards" for Thanksgiving dinners, by propping a name card up on their feet. In Kansas I use to make pumpkin rolls for all my friends and I lined up turkeys on top of each pumpkin roll. 
There are many possibilities for the turkey trot.

 So if you can't tell by the pictures, I'll explain how easy it is. Gather your supplies. Melt your almond bark. Put a big chocolate drop of almond bark on top of a (half) graham cracker. Put two candy corn down on the  edge of the chocolate "glue" you just put down. Put the creme drop down behind or on (depending on your creativity) the two candy-corn-feet. Make sure the flat end of the creme drop is "the back". The rounded in goes on the candy corn.  Put another dollop of chocolate glue on the bottom half of a turkey. I like to always make sure my feathers (stripes) are going up and down. But then again, that does not matter either. Stick the cookie on the back of the creme drop. Then dip the back of another piece of candy corn in the chocolate glue (just a smidge) and set it on the creme drop for the turkey head. We use a toothpick dipped in the chocolate glue to make the eyes. Sometimes we put a little pumpkin (the candy-corn-kind) beside the turkey. I did not buy any this year and could not find any when I remembered! 
 At the end of the day, we again have several hundred turkeys....and lots of new memories. The Turkey-Treat-Makin'-Day has just become one of those sweet (very sweet!!!) traditions that has continued through the years and has become part of our annual Thanksgiving rituals. Next year we look forward to including Leightyn, who will be one and half. She will just love it! I can hardly wait to make these again next year! 
Linking to:

11.14.2012

We Interrupt This Football Game to bring you...LIGHTS!

I got a pair of new lamps this weekend.
 Actually I had all the "pieces" to my two new lamps f.o.r.e.v.e.r! And I mean like a year f.o.r.e.v.e.r!

 Obviously, there are no edited photos in this post! Can you tell by the packaging above that I really did have all the pieces to make these lamps for a long time? We used a lamp kit for each of our lamps. The only thing I did that I did not get pictures of, was to spray paint all that gold a deep bronze. It ended up that it did not matter, as I did not use the harp and you can't see the other pieces. 

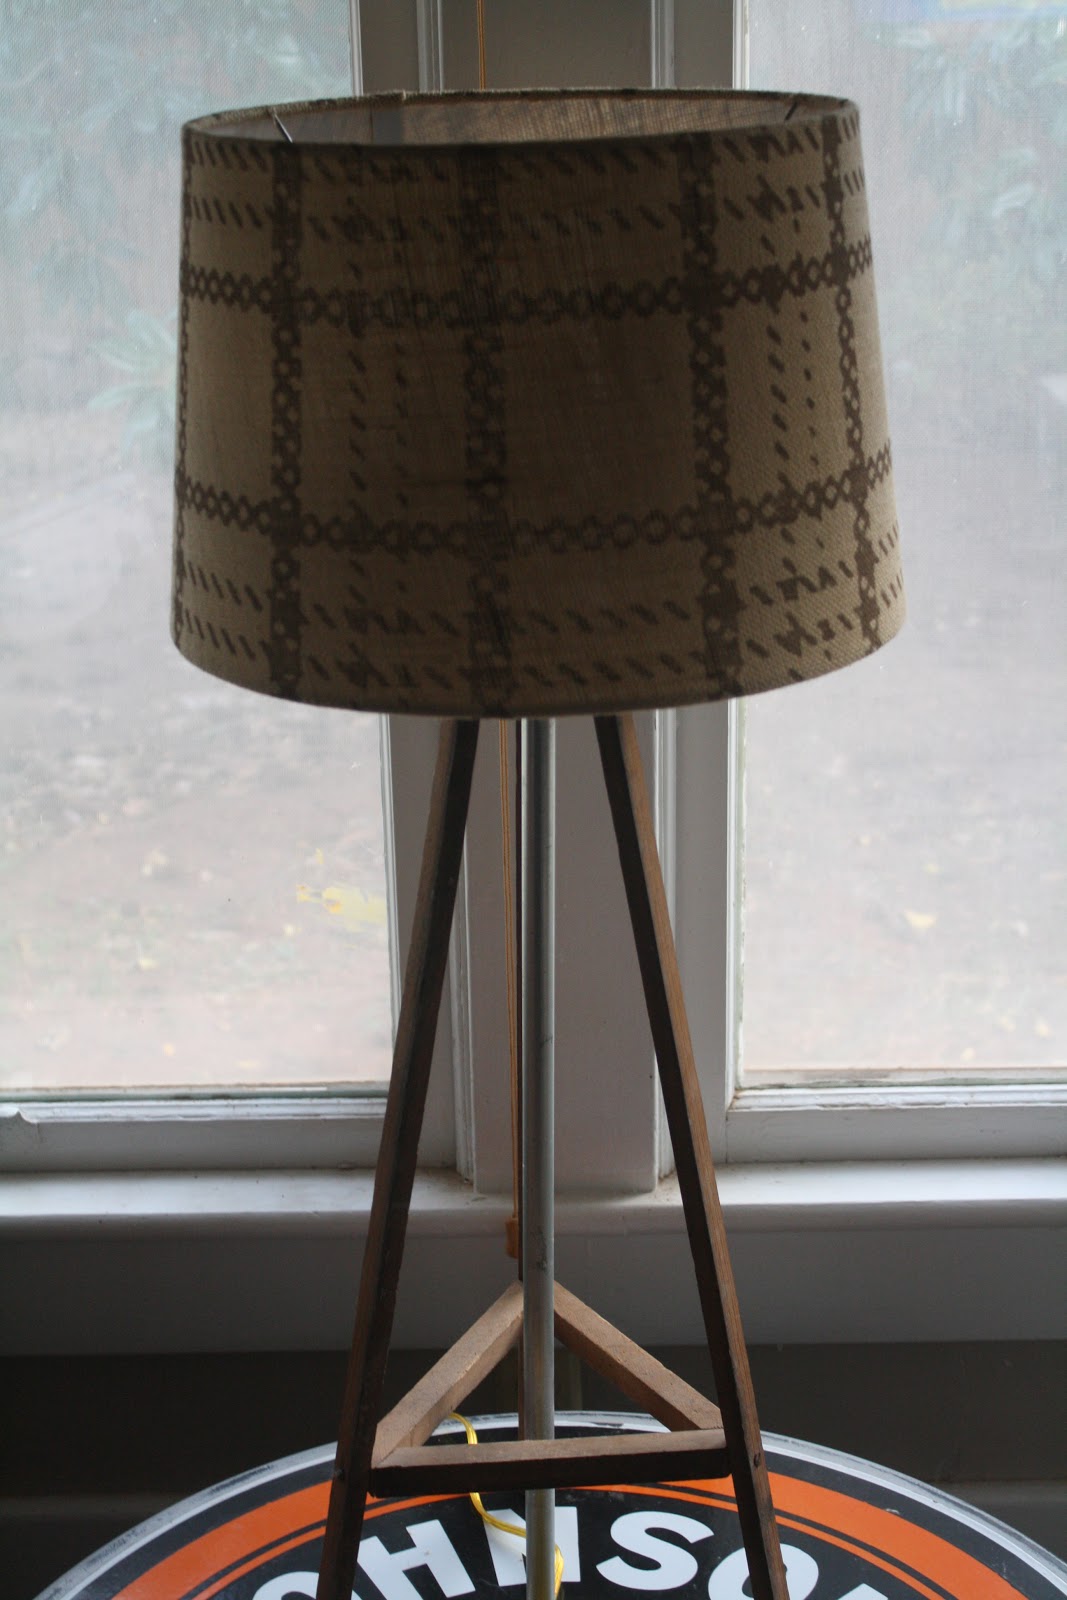
 About a year ago, I bought two of the tripods above from my favorite picker Renee. She had four of them, and she said they were part of a quilt making table(?)/thingy. That clears everything up, huh? Anyway, I wanted a tripod lamp and never broke down and bought one. I love the "quilt table thingy's" that Renee had in her booth and I instantly saw "tripod lamps". ...Then a year later that "instantly" turned in to two lamps! ha!
Anyway, I bought two of the "thingys" for under $20 each.
 After I found the "quilt table thingys" I found these lampshades on clearance at Target for $9. Do NOT run out to Target trying to find some for yourself. I had these for over a year as well. Yes, I move quickly on projects! 
 This picture is a more true picture of the color of the lampshades.
They are very cute. How did they never sell at Target?  

 During the middle of one-of-the-thousand-weekend-football-games that were on, my Hubs drilled the holes for the make-it-yourself-lamps. Seriously, it took all of 30 minutes at the MOST to make these TWO lamps. It only took that long, because he had to drill the holes during commercial breaks! True story. 

 THEN because I did not want a (stupid) cord hanging down the middle of the tripod (like most have), I bought a cheapo galvanized pipe at Lowe's. I got it in the electrical section and it was less than $2 for a long piece. (During a commercial) my Hubs cut the galvanized pipe in to the two sections I had marked off. (I can work during the game and it does not affect me.) He then drilled a shallow counter-sink hole for the top of the galvanized pipe to fit into the "quilt thingy". To be safe, I put a little 6000 glue on the end of the pipe. 

 We then put the electrical cord through the pipe that sits in the middle of the tripod thingy. Not only does the pipe hide the cord, but it also brings more of an industrial look to the new lamps. 

 The cord is barely visible as it comes out the bottom of the pipe. 

 I love how the houdstooth burlap lampshade looks with the wood tripod and metal leg. 

 So for less than $55 dollars, I have two new nice-size lamps. 
 We bought the 3-way light kit, so the lights can be soft or put off lots of light for reading. I could not be happier with our creation. I am just wondering what took so long to do this????
Linking to:

11.08.2012

Calling all Pumpkin Eaters!

Do you want to know something funny?
I don't like pumpkin. Neither does my mom.
As in pumpkin anything.
But we both love to cook pumpkin everything!

 Our families love pumpkin (everything), so we are more than happy to oblige their taste buds.
Especially in the fall when the weather is cooler and the smell of (anything) pumpkin is just heavenly as it cooks. 
 One of my favorite things to make each year is mini-pumpkin cheesecakes...with gingersnap crust. I have posted this recipe before, but it is one worth repeating. (According to the taste-test-experts that eat my cooking.) 

 It starts with a crust made of crushed gingersnaps and graham crackers. I always throw in a pinch of cinnamon as well. (The entire recipe is below.) 

 I use the end of a potato peeler to pack in the crust. I use one of those mini-cheesecake pans where the bottoms pop out. I ordered mine online. In fact I have two of them and they are so easy to use and worth the  (small) investment.  Funny story: TWICE my husband has thrown away the silver cylinders that go in the bottom of the pans. He always forgets what they are and thinks they are some kind of washer or disc. TWICE I have rescued them from their trashy fate. (And the Hubs is the one that LOVES cheesecakes!)

 I use an ice-cream scoop to put the same amount of filling in each spot. I know I did not take a picture of that, but believe me, that is what I do!  

 This is right after they came out of the oven. They do fall back a little after they cool, but that is expected. Don't let it scare you. 

 I made the pumpkin treats one day during a football Saturday and I put the mini-cheesecakes on this cute platter. I just thought I would show it off before it was filled with pumpkin cheesecakes. 

 How cute are these little bite-size cheesecakes?  

 With the cheesecake pan, they are so easy to do. It would be fun to make an assortment of mini-cheesecakes for a party....Or Thanksgiving! 

 I like to pipe my cool whip on the top, just to add to the cuteness factor.

Mini Pumpkin Cheesecakes
Ingredients
1 package (8 oz)  Cream Cheese, room temperature
½ c. pumpkin puree
¼ c. + 2 tbsp. sugar
1 egg
2 tsp. heavy cream
¼ tsp. vanilla
¼ tsp. cinnamon
¼ tsp. pumpkin pie spice 
¹⁄₈ tsp. nutmeg

For the crust:
8 gingersnap cookies
1 graham cracker
1½  tbsp. melted butter
1½ tsp. brown sugar
¼ c. pecans
pinch of cinnamon

DIRECTIONS:
1. Preheat oven to 350 degrees. Lightly grease a mini cheesecake pan with baking spray. Set aside.
2. In the bowl of a food processor, grind all ingredients for crust, except for the melted butter. The mixture should resemble slightly coarse crumbs. Remove mixture and pour melted butter over. Mix until crumbs are wet. Press into the bottom of each hole. Place in oven and bake for 10 minutes.
3. While crust is baking prepare filling beating together cream cheese, sugar and pumpkin puree until smooth. Add spices, vanilla, heavy cream and egg. Mix until just combined.
4. Pour filling over each crust, dividing evenly. Place in oven and bake for 20 minutes. Remove from oven and cool in pan for 20 minutes before removing cheesecakes (yes your cheesecakes will sink a little, this is normal).
5. Remove cheesecakes from pan using the bottom of a wooden spoon. Using a butter knife, remove metal bottoms and place cheesecakes in an airtight container. Refrigerate for 2 hours before serving.

Linking to:

11.06.2012

Turning over a new leaf...tablecloth

Just a simple Sunday afternoon dinner outside, enjoying the beautiful fall weather. My dishes are not the traditional fall colors, but I set the table according to a 
vintage tablecloth
I got from my mother. 

 I still wanted my tablescape to have a "fall" like theme, even if the colors were a little different for the season. I love the retro feel of the tablecloth. I used the colors of the corn to decide what dishes to use. 

 It just so happened that I had leaf dishes that matched the tablecloth as well, so I was sure to include them in the tablescape. They worked out perfectly. 

 Of course, I had to use some corn in the tablescape, since the tablecloth is covered in corn design. I chose a couple of Indian ears of corn, that were more on the muted side. 

 I cut off parts of the corn husk and used it to wrap up the silverware at each place setting. I used a (very small) piece of clear tape to keep the corn husk wrapped around the utensils. 

 I purposely tried to use a different color of husk at each plate. The colors of the corn and corn husk blended in perfectly with the muted greens and blues. 

 My leaf dishes and green goblets are both Wal-Mart specials. Neither were over $1, as I bought them both after the holidays. 

 I put some cabbage plants, pansies and the corn in an old earthenware bowl for the simple centerpiece. 

 While the corn skirted the edge of the tablecloth, the inner part of the cloth is scattered with leaves. My plates were a perfect match. 


 When it was time to use the silverware, it tore apart easily and that little piece of tape in the back was not a problem! 


 Sometimes the very simple tables are just as wonderful as the grand tables with expensive dishes. 


Especially outdoors, on a lazy Sunday afternoon, with beautiful weather, with some of my favorite people! 

Linking to:

LinkWithin

Related Posts with Thumbnails