"I do not claim that I can tell a story as it ought to be told. I only claim to know how a story ought to be told." -Mark Twain


8.07.2013

Time Capsules

When you walk in the front door of our house, you walk right in to the 
(not-so-formal-)living room. 

 For some reason, this room seems to get all the left-over furniture. It will be beautiful someday....and all that is beside the point. Getting back on track...You walk into our nice, big living room (and yes, you will undoubtedly be greeted by two photo-bombing dogs) and there is a big brass-tray-coffee-table right in the middle of the room. 
 In this large room there is no TV. But there is seating for plenty (plenty more out of sight too). On that brass table I have put a big tarnished silver tray and filled it with some of my Instagram pictures I have had printed. 
 It is the perfect place to put a tray full of pictures, because a lot of conversation goes on in this room. Since there is no TV, of course everyone is talking! ..............And rifling through my pictures. 
 Let it be noted before we move on, that yes indeed my parents have told me on more than one occasion that the silver tray needs to be polished. Duly noted. But you understand, I am sure. Anywayyyyyy, I have had my Instagram pictures printed off in four different sizes, three of which I have put on the (tarnished!!) tray. 
 The ones on the left are printed off with the large white border so that a person can write a note on the white part. I ordered them thinking that was a great idea, to write something about the picture, but as you can see, I have not done so yet. (I'll do that after I polish the tarnished tray!!) The size in the middle is a great size. A perfectly square picture. I love this size. Then the ones on the right are the original way that the company first printed Instagram pictures. I love those too. It is like getting a pixie picture. 
 The "big" pictures are 4 x 4. Such a great size to put on a tarnished tray for viewing. 
 The ones with the "note space" are 2 1/2 x 3 1/2 total, with the actual picture being 2 inches wide. 
 The pixie pictures are 2 1/2 x 2 1/2. But believe me, even with the diminutive size, they pack a punch. 
 I like the fact I have three different sizes on the (tarnished) tray. It makes going through them fun as we search around. 
(If you are asking yourself if tarnished silver should be paired on a brass tray, I just wanted you to know that in my world it works great!!!!!!!!!!!!) At least for now!

 All the pictures, no matter the size, are printed on a heavy card stock. The colors, as you can see are rich on that thick paper. 
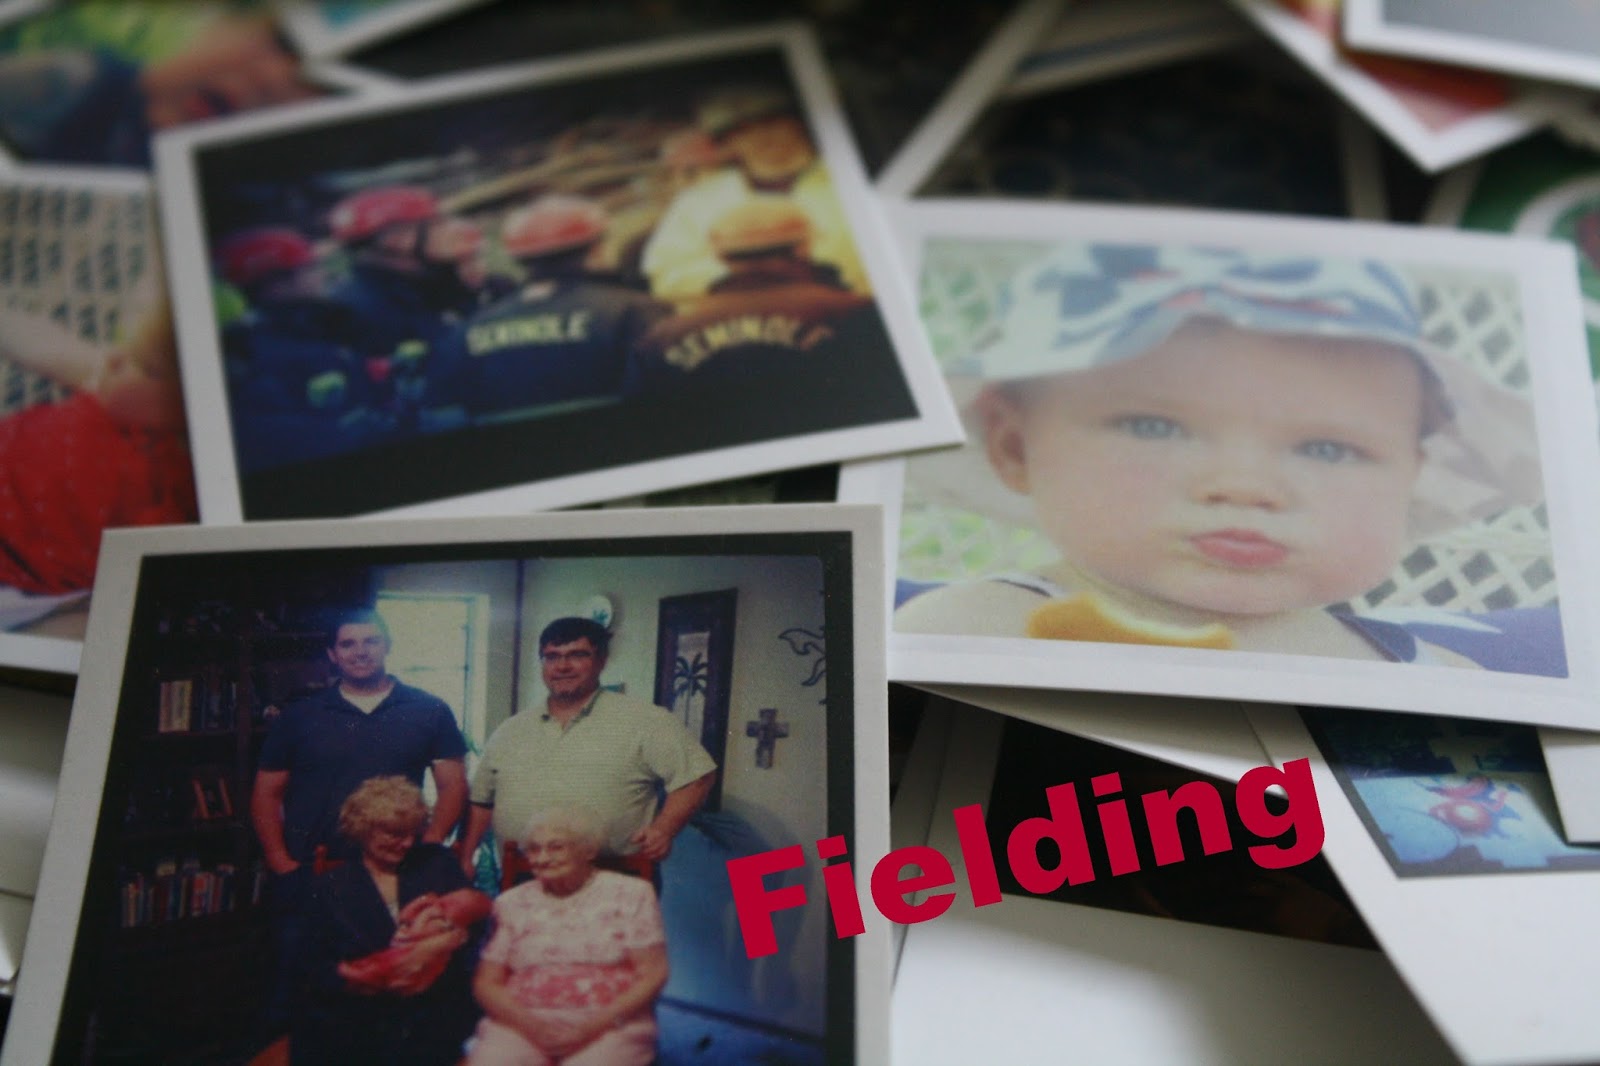
 One thing I have noticed since I started the Tarnished Tray Pictures is that you can always tell which one of my children have been here visiting. Of the five of them, four of them always leave pictures of themselves (or their child) on top. So if Fielding had been here here visiting, I would find something like this (above). 
 Annie's would be something like this AND she would ask why Fielding had replaced hers on top with his. 
 Taylor's would be like this...and the next two or three layers would also be hers as well. She doesn't settle for just one layer. 
 Luke's would look like this....AND he would hide the pictures of his sisters and brothers. 
 Coulter is the only one of the five that does not care. If he did put pictures on top, it would probably be of the babies (his niece and nephew). 
 You know what I like about the pictures printed and laying out in the open? They are like a modern-day photo album. They are little glimpses into my family's year. They are reminders. They are memories. For instance, the pictures above are of (l to r:) one of the many graphics that were/are popular throughout Oklahoma after the two monster tornadoes hit our state in May; one of my students that came back to my classroom for the first time after missing weeks of school because of a horrific car wreck; and a screen shot from my phone of a Flood Warning in our town...in JULY!!  Those pictures are just as important to me as the pictures of the kids and the babies and the dogs. 

 You know, absolutely any picture can become an Instagram. Save it to your phone camera roll and then open it again in Instagram. I know this works in both Androids and Iphones. I save pictures from my blog all the time. 
 I have also downloaded several apps to be able to write on my instagrams or make collages of my instagrams. I even have one that makes drawings of my photos. There is so much picture fun available for our phones. 
 In case you are wondering where I get my Instagram pictures printed, it is through a company called Printstagram (printstagram.com). I have had the picture sizes you have seen done, as well as the Memory Box and Tiny Book. I am going to do the poster some time soon, as well as stickers. I think the prices are very reasonable. 
 I ordered a bunch of gifts right before Christmas (for stocking stuffers) and they all arrived in time. 
 Funny story before I wind down from my long-windedness: A couple of years ago, one of my daughters had Instagram on her Iphone and I did not have it on my (then) Android. I loved her pictures and wanted the app so badly! I could not find it to download it, not realizing it was not available for Droids at the time. I gave my phone to the Hubster, asking him to find the app for me. A little while later he gave it back and I searched my phone looking for the icon so I could get started. I did not find the Instagram button. I questioned the Hubs on what he had been putting on my phone, if it was not Instagram. Well, in searching for Instagram he had found an app called "Identifying Trees". You could use it to peruse the hundreds of pictures of trees, trunks, stems and leaves to see what tree it was you were trying to identify. There was everything you ever wanted to know about every tree in the world. He said he thought since there was not Instagram for Droids yet, that I would enjoy the interesting tree app. True story. And he meant it!!!  
 You can bet the first day Instagram became available for Droids, I had it downloaded (right beside the TREE app)!!!  One more thing, I have this pair of mini frames. The opening is only 1 1/2 x 1 1/2. My small Instagram pics fit right in! 
You don't have to have a big (tarnished) silver tray to get started on your Instagram pictures. A small plate or bowl will work just as well. 

Print some off and see if your family and friends enjoy them as much as we do. No matter where you have them printed, it is great having little capsules of your life right there in front of you. What are you waiting on?
Linking with:

8.06.2013

Behind Closed Doors


I was going to title this post "What I Did This Summer". I guess that is the teacher in me coming out.
But in reality, it just took me a day, and "Behind Closed Doors sounds so much catchier! 

And, just in case you want to bow out now, this is part of what is behind that closed door!
When we moved in two years ago, this is what was behind that closed door. It is a closet that is under the stair way. The door opens up into our dining room. It appeared that the closet had probably been used as a coat closet in its former life. 
The room is probably about four feed wide and seven and eight feet deep (depending on the angle). It even has its own window. Even with the ugliness of the closet, I knew immediately what I wanted to do with the closet. It would become a dish pantry!
After all, it opened into the dining room and I had plenty of dishes to fill it. The picture above and below are as I unpacked my dishes when we moved in. I'm telling you, I knew I could fill that closet!

The first thing I did was to take out all the closet hanging rods. Then I used a gallon of "Oops" paint from Lowe's and the beadboard wallpaper from Lowe's and cleaned that closet up. It not only cleaned it up, it completely brightened it up. 
My Hubster also built some shelves to fit under the stair part. They are thick and sturdy. We bought two chrome shelves to go on one side of the closet and I piled the dishes in. For the two years we have lived here, I had the chrome dishes on the side where the window was. That side was a little deeper, so I thought that logically the shelves should go there. I cannot find my pictures of that stage of the closet, but believe me, the dishes were piled in there. 
But since I just piled stuff in randomly, there was no sense of order and I often had to really look to find what dish(es) I wanted. When I first put all the dishes in, I was just anxious to get them put up and out of the way. But after two years it was driving me crazy with the disorganization. 
So one day this summer I pulled out every last one of these dishes. I had them piled on every surface and all over the floor. I had them in several rooms as well. But it needed to be done. I moved the two chrome shelves over to the solid wall. Even though that side was not as deep, it is so much better having the shelves on that side. 
I bought several sheets of foamboard and cut it to fit my chrome shelving. Then I started to put things back in.....with some organization. I put all the glassware together on a couple of the shelves. I put the glasses down so that nothing would accumulate in the cups. 

I put all my cute little decorative bowls and ramekins on one shelf. 
All my big fun (or seasonal) bowls together. 
Vases are now easy to find all grouped together. I use the red pitcher for flowers, but I have a shelf just for pitchers too. 
I have two shelves of fun salad-size plates. Those are fun to pair with my solid color dinner plates for so many different looks. 
This shelf is mainly for odds and ends.....cake stands, a couple of vintage cookie jars, a bus from London and a few extra pieces. 
The bottom shelf holds all my chargers. Then I put all the tea cups from my Jewel Tea together in a basket and sat them on some of the chargers. It was a good way to put some odd and end pieces of those dishes together. 

Then those shelves that the Hubster built under the stairs...Well they hold all the seasonal dishes. The top shelf is full of crystal and silver. The second shelf has all the fall dishes. I have a huge set of Jewel Tea given to me by my mother, as well as some other random fall dishes. (I have no idea how I missed painting the edge of that top shelf. It has been that way for two years and I just noticed in this picture. Believe me, I will take care of that! Those kinds of things bug me!!!!!!!! Gah!!) 
The next built-in shelf holds all my Christmas dishes. Actually it holds my Christmas dishes as well as my solid reds. But in my (anal) mind that all goes together! 
Sorry, for the bluriness, but the bottom built-in holds a variety of dishes. The Randoms. (It was hard to take pictures in this closet. It is only four feet wide!) 
I used a vintage file sorter to "sort" my big platters. It worked out perfectly! 

Then I was left with a bunch of salad size plates for different holidays. Like I said, I love to mix cute salad size plates with big solids, and it is more economical to buy that way. But I needed a place to put all those. SO, I took all the holiday small plates and put them under the chrome racks. It is kind of (blurry) and hard to see, but it fills it up under both set of chromes. The perfect fit! 

By the end of the day the closet was organized and put back in a much better and efficient way. I can now just open the closet door and know exactly what I want and where it is. The dish racks are not in front of the window now and it looks so much better. I did not have to buy a single thing; I just needed to make better use of what I had. 
I will have to show you what I ended up doing with that window in the dish closet and what I put on that blank wall under it. Believe me, I used every square inch of my coat closet turned messy dish closet, turned organized dish pantry. 
(Not to mention the fact my blue and whites were all together in their own cupboard.) A place for everything and everything in its place! You never know what you'll find behind closed doors! 
Linking with:

8.04.2013

It Doesn't Get Better Than This!

Of all the cakes I make, I think this one is probably the favorite of most people....

Banana Cake with Caramel Icing. 

 I made the cake four times this summer for four different events, and this is the only time I got any pictures of it. Part of the reason for that is because if I don't take pictures before we cut the cake, there is never any cake left to take pictures of afterwards. It is that good. Both the cake and the icing are homemade. I know I know, it takes a little effort, but it is so worth it. This particular cake (pictured) was made for my Mother-in-Law's 80th birthday. I carted that cake over 100 miles on that cake stand just for her! 
I put my favorite banana cake recipe with my favorite caramel icing recipe. Here is the recipe for the yummy goodness:

 BANANA CAKE
1 1/2 cups mashed ripe bananas
2 tsp. lemon juice
3 cups flour
1/4 tsp. salt
1  1/2 tsp. baking soda
3/4 cup butter, softened
2 1/8 cups sugar
3 large eggs
2 tsp. vanilla
1 1/2 cups buttermilk
Preheat oven to 275. (Yes, that is correct!) Grease and flour two round cake pans. In a small bowl, mix mashed banana with the lemon juice, set aside. (The more ripe your bananas, the better the cake will be.) In a medium bowl, mix flour, baking soda and salt. Set aside. In a large bowl, cream  butter and sugar until light and fluffy. Beat in eggs one at a time. Stir in the vanilla. Beat in the flour mixture, alternately with the buttermilk. Stir in the banana mixture. Pour into prepared pans and bake in preheated oven for one hour or until toothpick inserted in the middle comes out clean. Remove from the oven and place in the freezer for 45 minutes. This will make the cake very moist. 

 Caramel Icing
1 cup butter
2 cups firmly packed brown sugar
1/4 cup, plus 2 Tbs. whipping cream
2 tsp. vanilla extract
3 3/4 cups powdered sugar
Melt butter in a 3-quart saucepan over medium heat. Add brown sugar; bring to a boil, stirring constantly. Stir in whipping cream and vanilla. Bring to a boil. Remove from heat and let cool for 1 hour. Transfer the frosting to a mixing bowl. Sift powdered sugar into frosting. Beat at high speed with an electric mixer until creamy and spreading consistency. Spread between layers and all over the top and sides. There should be plenty for a two-layer cake. (Yield 3 3/4 cups)

There you have it. THE best cake and icing. Of course sometimes I make the banana cake and put chocolate buttercream icing on it. OR I make caramel cake and put the caramel icing on it. MMMMM. So many good cake ideas!

By the way, do you say car-mel? Or car-a-mel?
I promise you will say "DELICIOUS" after you try this! 
My mother-in-law says it is her very favorite!
Edited to add: I had a reader write me and say her icing turned out very thick and she could not spread it. I have not had that happen but I "googled" it up and the answer is to add more of the whipping cream a tablespoon at a time. (My other suggestion would be to try 
3 1/2 cups of powdered sugar first and see how that works.)

The Hubs explaining to her how to use the new I-pad we got her for her birthday......  :)

Linking with:

Metamorphosis Monday

Stone Gable TTT
Open House Thursday
Foodie Friday
Feathered Nest Friday
Fabulously Creative Friday
Create It Thursday

LinkWithin

Related Posts with Thumbnails